Turn on Developer Mode in ChatGPT (Settings, then Connectors, then Advanced), add your site as a custom connector, and approve it once over OAuth. Custom connectors are a beta feature on ChatGPT’s paid plans.
Setup guideConnect your AI client
Nine clients connect today. Any MCP client can.
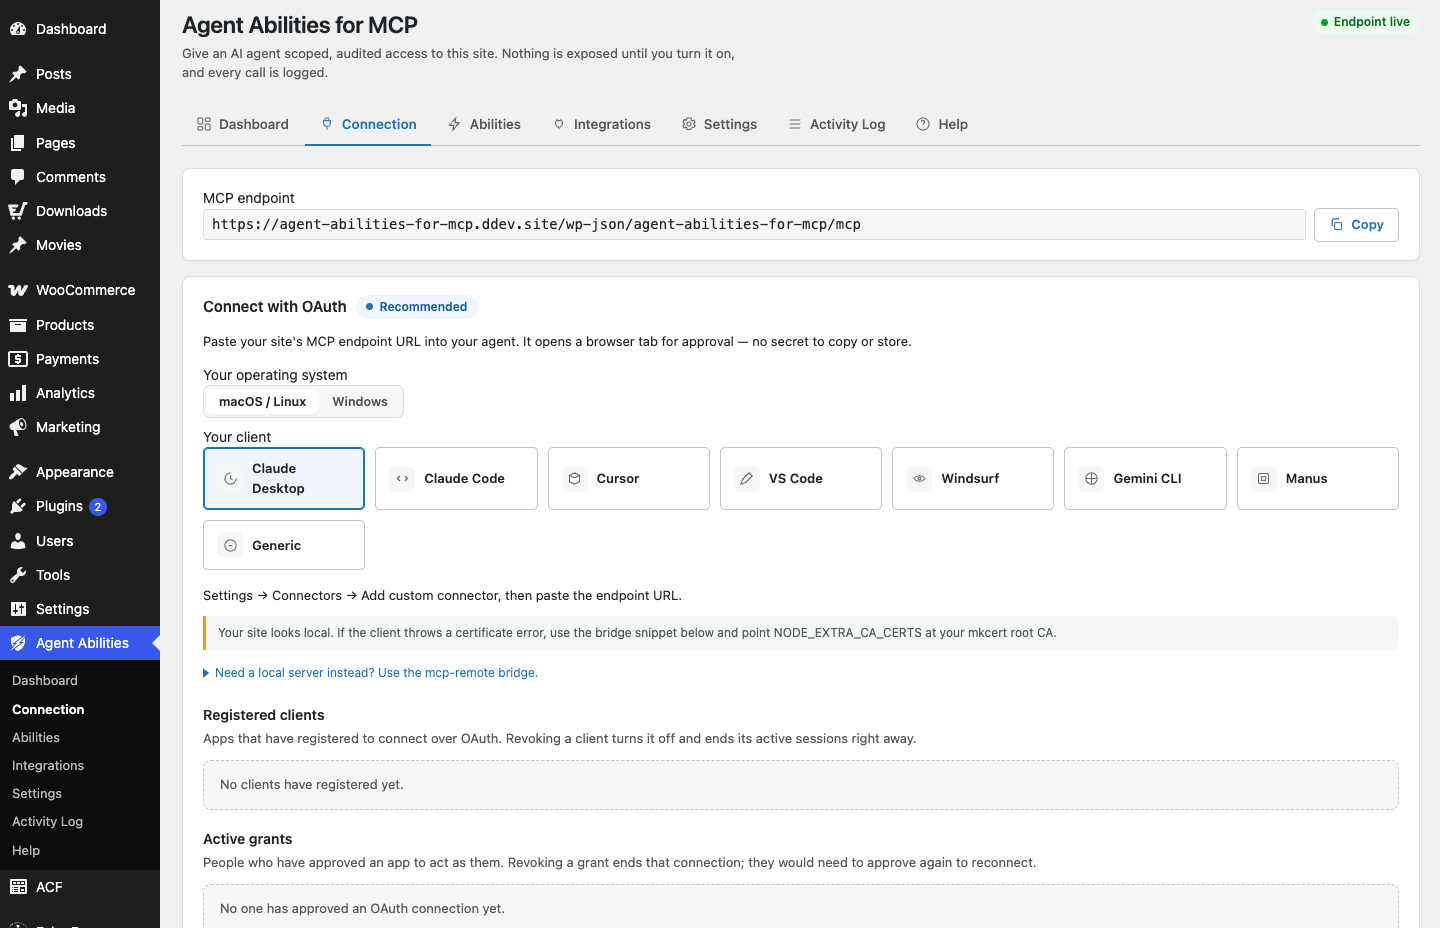
ChatGPT, Claude.ai, Claude Desktop, Manus, Claude Code, Cursor, VS Code, Windsurf, and Gemini CLI work now, directly or through the open-source bridge. Anything that speaks the Model Context Protocol can point at the endpoint your plugin gives you and connect as a scoped user.
The clients we have verified
Nine connect today, some directly and some through the open-source bridge that runs on your own machine. One more are planned as their apps add support. Each working client has its own short setup guide.
In Claude.ai, open Settings, then Connectors, add your site as a custom connector using your MCP endpoint URL, and approve it once over OAuth. Custom connectors on Claude.ai are a beta feature.
Setup guideClaude Desktop uses the same custom connector as Claude.ai, so a connector you add in one shows up in the other. Open Settings, then Connectors, add your site using your MCP endpoint URL, and approve it once over OAuth. Custom connectors run from Anthropic’s side rather than from your own machine, so your site has to be reachable on the public internet. A site on localhost or behind a VPN will not connect this way even though the app is sitting on your desktop.
Setup guideIn Manus, add your site as a custom MCP connector using your MCP endpoint URL, and approve it once over OAuth. No local bridge to install and no Application Password to copy.
Setup guideCLI and IDE. Connects over OAuth or an Application Password as a scoped user you pick.
Setup guideCode editor. Connects over OAuth or an Application Password as a scoped user you pick.
Setup guideCommand line. Connects over OAuth or an Application Password as a scoped user you pick.
Setup guideWants a streamable HTTP connector the adapter does not serve natively yet.
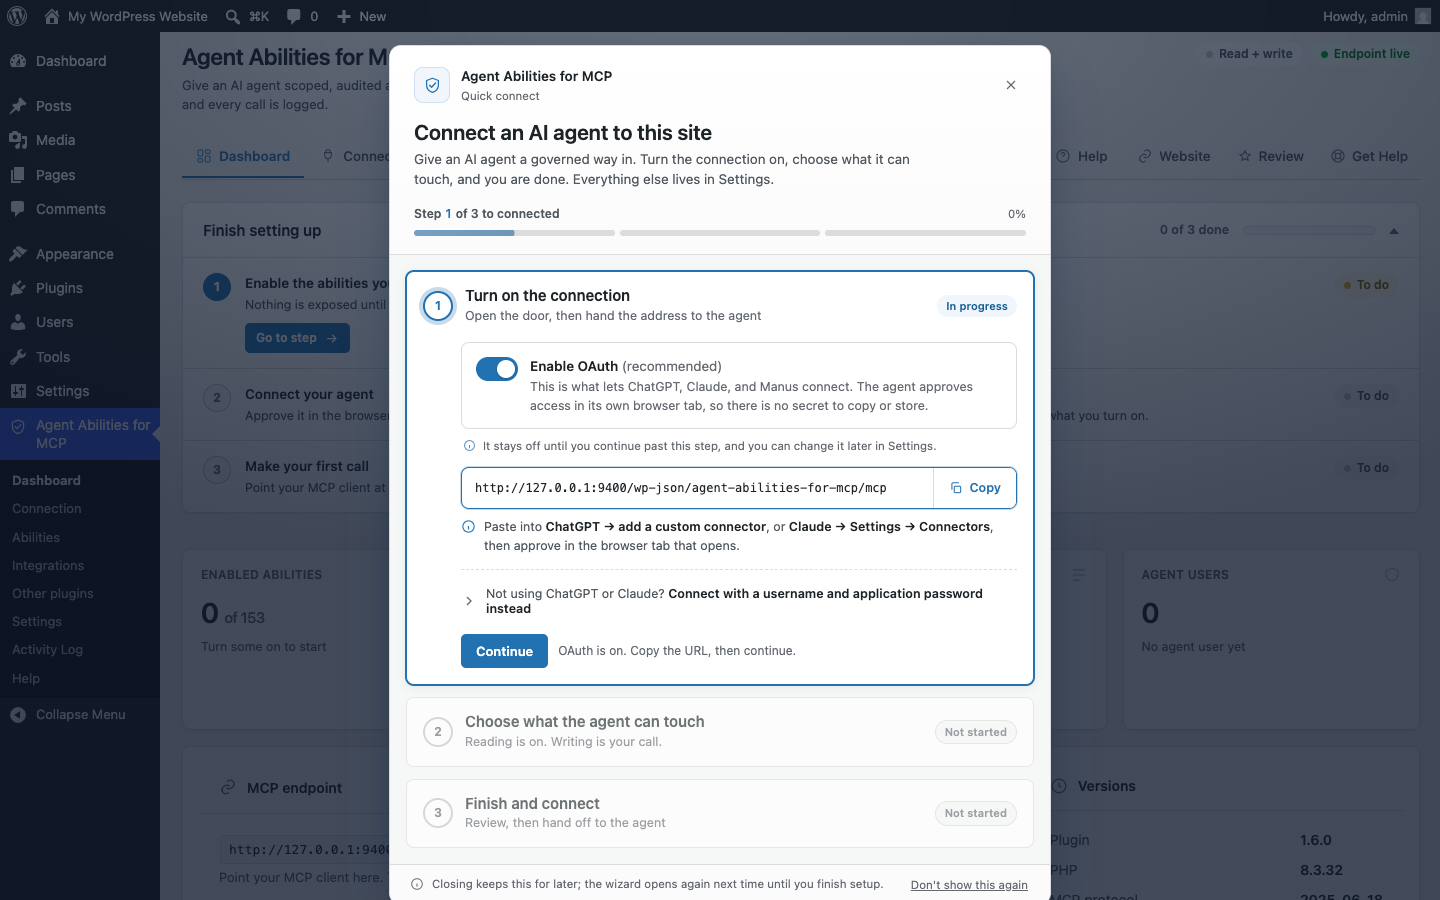
Your first connection is a three step wizard.
Quick Connect opens the first time you land on the plugin page. It puts the whole first connection on one screen: OAuth, the endpoint to copy, and what the agent is allowed to touch before it connects.

Works with any MCP client
The named clients are the ones we have checked. The connection itself is standard MCP, so any client that speaks the protocol can point at the endpoint your plugin generates and connect. There are two ways in, and both stay least privilege.
Approve once in the browser
Approve the agent once in the browser, while logged in as the account you want the agent to be, because it takes that account’s capabilities. There is no secret to store.
Bind a low-privilege user
Point a dedicated low-privilege user at the endpoint. A guided screen builds the client config and checks the endpoint for you.
Connecting clients: Clients that cannot open a remote MCP connection use the open-source mcp-remote bridge, which runs on your own machine.

Requires WordPress 6.9+ and PHP 7.4+. Free on WordPress.org, no paid tier, no API key to buy, no usage limits.
Point your AI client at WordPress, on your terms.
Install the plugin, keep everything off, connect your client as a scoped user, and switch on one ability at a time, then try a prompt once you're connected. Your client connects in, the plugin never reaches out.
Zero outbound calls. No telemetry. Your data stays on your site.